
Making Links
Links
| In Brief... | |
|---|---|
|
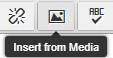
For File Links, put the cursor at the desired location, use the mountain/sun icon
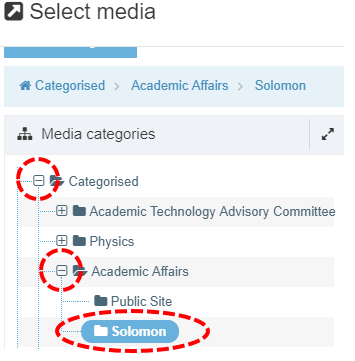
In the overlay that appears, use the + sign to expand next to Categorized, the + next to your department AND the + next to Solomon (this is also the only location you can add new files) Use your filter to search for existing files or use the +Add media in the top right to add a new file. To select a file after it is added, click its name. If adding an image, you will be prompted for variants that ask about the size you wish to upload. These variants are made automatically and are sized to fit the content type you are using. When linking to a file like this, the Name box description that it was uploaded as appears in the editor as the default link. Use Save and Approve from the drop-down on the lower right side to publish. |
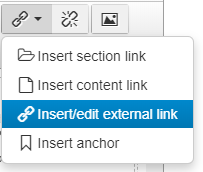
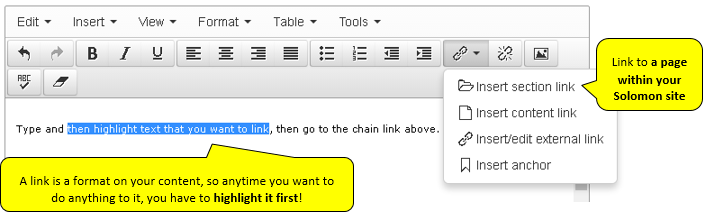
URL Links are done with the chainlink icon.
Hit the drop-down and choose Insert Edit External Link for sites that are not yours in TerminalFour. If pointing to a page of yours, use the Section link option. The External Link option needs the full URL with the "http://" part in front of it. Hit OK. Use Save and Approve from the drop-down on the lower right side to publish.
|
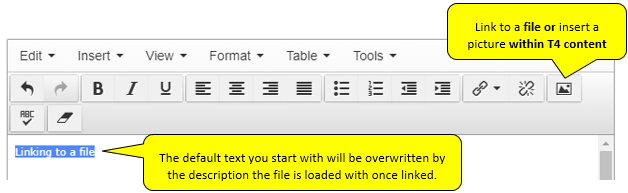
Linking to a file/Inserting a picture on a text area
An overlay will appear to Select Media. It is CRITICAL that you expand the + sign next to Categorised, then expand the + sign next to your site folder AND to select the Solomon equivalent folder for your site as it is the only folder you can write to. You may see other folders like your public site folder and you can use those files in your links, but be aware that you can only add and manage files in your SOLOMON folder.
Depending on how wide your screen is, folder selection may be above OR to the left of the files already loaded to your site. Here are some highlights of that area: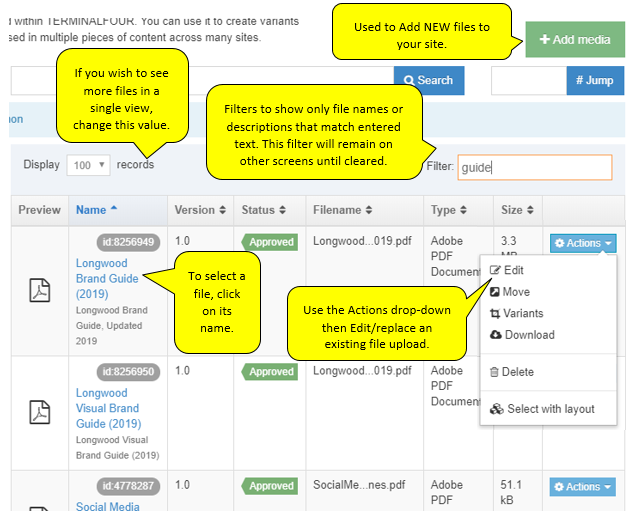
To load a new file, use the  , button located in the top right corner of the page.
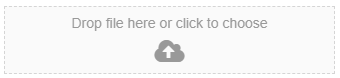
The initial interface will have a box like this that you can drag files into or click on to browse for new files.
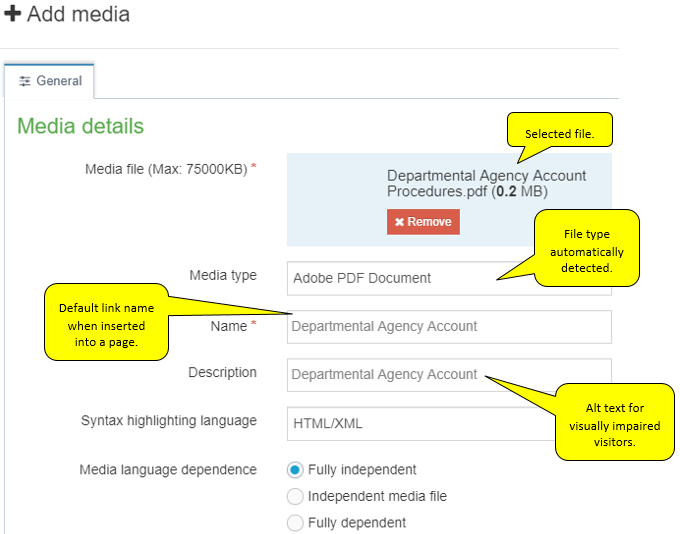
Once this area is filled in, it will look like what you see below. It is important to add a Name and a Description for maximum accessibility to visitors.
File names should not include special characters other than hyphens - and underscores _. Some characters can cause more problems, especially #, &, and extra periods in the file names and can cause the files to not load. Very long file names can also cause loading problems.
To Replace An Existing File In The Content Area
Visit the Actions menu  for the old file and choose Edit. You will get a box that you can swap out the old with.
This new file update is subject to the page publishing rules of 15 minutes after/until each hour before the changes are pushed out.
Keep in mind that sometimes files need replacing, where other files like meeting minutes need to be added and should not replace a previous meeting's minutes file.
Editing the default text that appears on an inserted file link
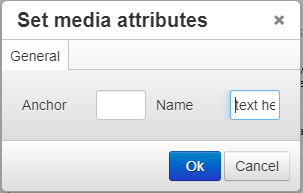
This can be done by double left-clicking on the file name once it has been inserted into the text box of your page. Add the text you DO want to appear in the Name box, as pictured below. You can edit the link text in the source (Tools, <>Sourcecode), but it will not be saved unless you use the interface shown below.
Inserting An Image In A Text Area
This is done just like inserting a document link above, but instead of a text link, the image will appear.
Additional variations for images are that you will be prompted for the image size to use. Variant sizes are automatically created in pre-set sizes to choose from. Click the name of the variant to choose the noted size. That interface looks like this:

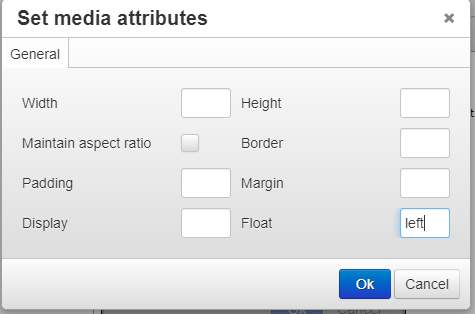
If you wish to change how the image is aligned with text around it, you can double left-click on it after it is on the page, as you did with the file link text editing and you will see an interface that looks like this. The formatting of the site only allows you to use the "Float" box. Appropriate entries are "left" (no quotes) to align the image to the left and wrap text around the right if there is room, and "right" (no quotes) to align the image to the right and wrap text around the left side of the image. Disclaimer: Center is also a valid choice, but it so rarely looks good, you should avoid it.
Making a Link To Another Terminal Four Page (Section Link)
Section links are only available to Solomon pages you have access to edit in TerminalFour. Links to Solomon sites that are NOT editable by you should be made with the Insert/edit external link option below.
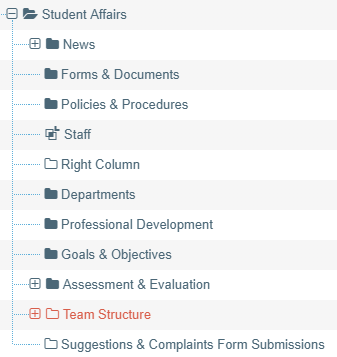
When you click on Insert section link, you will see an overlay of pages you can edit in TerminalFour. Expand any + signs you need to view the pages you want to select. Left-click one time on the desired page.
The advantage of section links is that they will automatically update should your site change URLs or location.
Making A Link To A Page Outside of Terminal Four
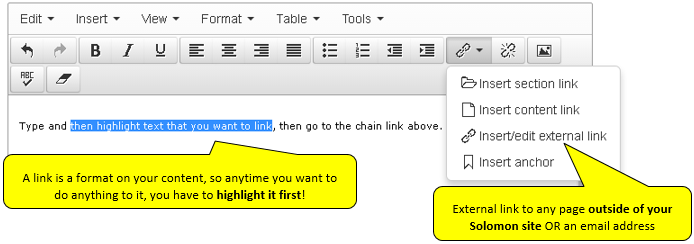
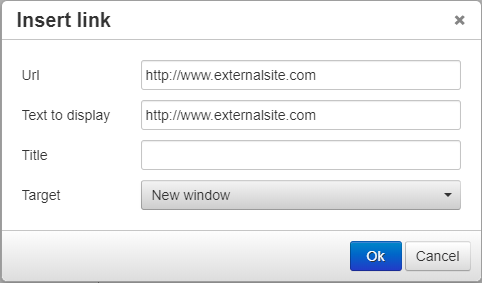
Clicking Insert/edit external link will give you the pop-up overlay shown below. In the URL box, add the full URL, complete with http:// prefix.
The Target option allows you to choose if the link opens in the same window (None) (the default choice) or a new window/tab (New window option). If you want someone to look at a page, but then return to the current page, using the New window choice is recommended.
This type of link will not automatically update if a URL changes, resulting in a broken link.
E-mail links are made with this option as well. Instead of typing a URL, you type mailto:youraddress@longwood.edu there should be no spaces and be sure you use the colon and not a semi-colon. Be aware that the "text to display" is the text that is shown to the visitor, but the URL line is what the link actually points to, making it work.
E-mail links can be typed in the regular editor as well with the syntax youraddress@longwood.edu but be aware that you will need a space or a new line after it to make it turn into a link automatically without visiting the chain-link drop-down.
If you edit an email address or URL in the regular editor and not utilizing the chain-link, be aware that the VISIBLE part of the link may change (Text to display) but it won't change the part that makes it work (URL). You'll need to visit the chain-link and Insert/edit external link to make those links of edits.
Making A Link To A Content Area On A TerminalFour Page Such As Policies and Forms
It is usually best to navigate out to the live Solomon website, navigate to the form or policy, copy that hyperlink, then add it using the Insert/Edit external link instructions above.