
Working With Images
You may use the Select Media icon if adding an image file. This icon is only used for images. It will allow you to insert a non-image file (.DOC, .PDF), but the live page will have a "broken image" icon on it.

The Select media button will place an image into the "featured image" slot in a news article. That will make it appear in your news feed along with the teaser as well as at the top of the story when opened. Consider not using the biggest image possible at the top of a story as that will push the content further down the page before the reader can access it. Using an image as the main image of an article will bring its name into the story as a caption.
When Select media is used WITHIN a "General Content" type of content in TerminalFour, it will feature above the text on the page (or content piece, if more than one piece of content is used on the page. Think a General Content AND a News Feed or two General Content pieces on a single page).
Images within a text box on that page are added with the Insert from Media icon in a text box.
To add an image from an "Insert from Media" button (looks like a mountain and sun icon), your cursor must first be in the text area. If you can't click in a new blank box, there is a "sweet spot" within the top left corner of the box you can click in to make the cursor show. The Insert from Media button is at the top of your text box interface.
Any time you access the Media Library, you will need to drill down to the folder for your department, which may also involve opening a + next to Categorized. Select the Solomon folder under your relevant site. Depending on how many folders you can access, you may need to scroll back up to the top to see files in this area.
If you do not choose the Solomon labeled folder under your department name, you won't be able to add new files.
 Open + next to Categorized.
Expand down to and select the relevant Solomon folder for your site so that it is highlighted.
Any time you need to add a file to this area, go to  (+Add media) in the top right corner.
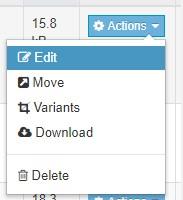 If you want to update an image, open the drop-down next to the file. Choose . If that option is unavailable, you are likely not in the Solomon folder for your site. Learn more about updating existing files here. Updating a file instead of just adding a new one updates ALL of the locations your file/image is used. Sometimes, files need to be replaced with a newly uploaded version instead of just updated, particularly if you need to keep the old version.
On the Usage tab, visible after you click Edit, you can check to get an idea of how many locations the file may be utilized with.

On the General Tab, use the Media File button to browse to or drop the updated file in that slot. Use Save Changes to update the file. A new area will overlay the page. Click on the grey square next to media file that says "Drop file here or click to choose". This will browse on your computer to allow you to choose a file.

Once the file is chosen, add a Name (required) and a Description. The description box could be the same text as the name content above it, but in the case of images, this text is what lets visually impaired visitors "see" the picture through voice reading software.
The description, if the text above in the Name box it is not enough, should entail what the viewer is intended to get out of the image.
From here, click Save Changes. 
You can find any previously loaded image files in a search or browsing using Filter. Note that Filters will remain through page refreshes, so you may need to clear that box to view all files or to perform another search to view everything.

Once you've found the image, it will look like this:

Click on the blue link in the image's row in the Name column.
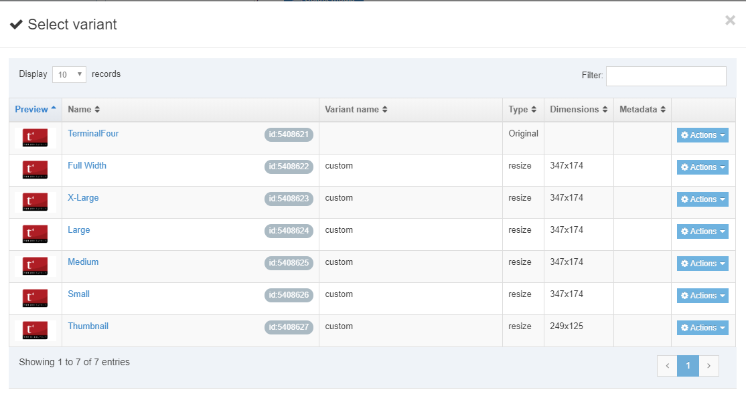
You will be shown choices automatically made by TerminalFour that accommodate the layout you are currently using for your page.
The top-most choice is usually the originally uploaded image, at its original size and scale.
Full Width is the biggest option you should choose, because it will fit your page's content.
The other choices are varying in size, smaller and smaller, down to "Thumbnail". One size doesn't work for everything, so a better rule is to ask yourself: "is it big enough to see what I'm trying to show?".
Images that were small when uploaded, will not have bigger versions created. In this case, the variations, despite their name, will mostly be all the same dimensions.
To pick a variant, click on the variant's name in blue from the Name column.
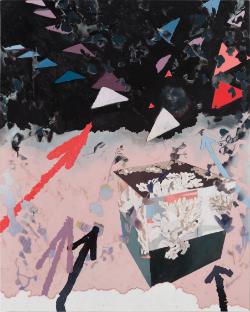 Images in text boxes can be aligned with text to wrap around it, if less than the width of a page. This gives more room on your page. For example, the default behavior of text around an image is display only one line of text to the right of an image like this paragraph is. See how much wasted space there is above and below the text to the right?
You can "double left-click" on an image to get the media attributes window, which controls text alignment.
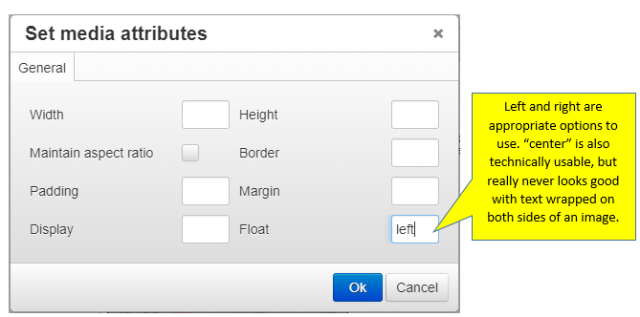
 The appropriate area to change is the value for Float. Type in the choice of left or right, without quotes or spaces in the Float box, as pictured above. Left aligns the image to the left side of the page, with text flowing around the right side of the image, as shown with the green image to the left. Right aligns the image to the right side of a page, with text flowing around the left side of the image. In the paragraph below, you will see the blue right aligned image, as a sample of that formatting.
 Other boxes in the media attributes window, though visible can't be changed to edit how the image looks on a page because of our site's formatting rules.
Once the image appears on the page and all edits are made to the rest of the content, simply use Save and Approve at the bottom of the page to submit it for publishing.
Updates to pages will be subject to the "15 minutes after or 15 minutes until the hour" publishing schedule (often it seems a bit longer with file updates)
After waiting for the publish period, test the live site. If you don't see an update, utilizing SHIFT+Refresh on a page you are trying to update to see the most current versing due to browser caching (browser stores old copies).
In the interim, you can also preview a page from within TerminalFour (in the actions menu of that content or page) to get an idea of how it will look when published.